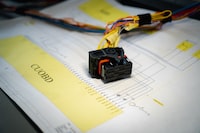
Creating Electrical Schematics

Introduction
Electrical schematics are diagrams that show how electrical components are interconnected. They are used to troubleshoot electrical problems and to make repairs. Schematics can be created using CAD (computer-aided design) software.
General steps for creating an electrical schematic
There are a few general steps that you will need to follow when creating an electrical schematic. These steps are outlined below.
1. Choose a CAD program. There are many different CAD programs available. Some are free, while others must be purchased.
2. Outline the schematic. This can be done by hand or using a template.
3. Add the electrical components. Each component will need to be placed in the correct location and connected to the other components.
4. Add the labels. Labels are important for identifying the various parts of the schematic.
5. Save the file. Once the schematic is complete, it will need to be saved in a format that can be read by the CAD program.
It sound easy but if you dont have any exprience is best to leave it to the professionals.
There are loads of great CAD companies in London to choose from.
We are currently doing a lot of work on electrical schematics in Sussex working together with another CAD company creating Electrical drawings and electrical schematics.


Leave a comment